Tuesday 18 June 2013

Karcher Steam Cleaner - Refurbished SC 1010 £50.99 unboxing

So after seeing some of the eco detailing posts on Detailing World, I wanted to have a go at using a steam cleaner on the car. I've seen many cheap ones on Ebay that people have been very pleased with, but I found the Karcher outlet had these refurbished models for £50.99 (+ £5.95 delivery).

I've always liked Karcher washers and have been very impressed with a Karcher  wet vac I recently purchased so thought I would give the branded one a try, rather than a cheaper Ebay unit.

What always concerned me when buying refurbished product is not knowing what you will get in terms of damage, visible wear to the body etc. Therefore I thought I would share my unboxing and first impressions with others.

Part One - Packaging

So its a refurbished machine and that means no pretty retail packaging:


It comes wrapped in this fairly sturdy branded brown box, no signs of excess trauma from its adventure through the courier network en route to me.

Also when opened the machine and accessories are very securely wrapped in machine folded brown paper rather than lots of polystyrene or blow moulded plastic:


The functional boxing doesn't bother me provided the contents are safe and secure. Also if one is buying a steam cleaner for eco detailing then recyclable rather than disposable packaging would defiantly appeal. One is not going to save the planet if the next years eco detailing is needed to offset the carbon footprint of a pretty coloured box!

Part Two - First Look


So on peeling back the first (of many!) layers of brown paper we get a look at the machine and it looks like new. Be careful when unwrapping as the parts are free in the box so don't get anything caught up in the paper.


Part Three - What's in the box


So all laid out and free from its cardboard cocoon we have:

  • 1 Steamer unit with captive hose and mains lead
  • Two Extension wands
  • 1 Floor Brush with 1 cloth cover
  • 1 Bristled hand tool brush with a cloth cover
  • 1 Detail brush
  • 1 Angled detail nozzle (Attached to trigger assembly)
  • Instructions
  • 3 De-scaler sticks
Part Four - Close ups

So first impressions were very good but what marks or scratches, if any, give this away as a refurbished unit.
Certainly in my case there was very little indication that the unit was anything other than brand new.

The body of the steamer and the accessories all seem unmarked as shown below:


The only marks I found were some scaly sludge around the water tank inlet and on the base of the tank cap:


Some of the sludge may actually be grease from close inspection but these are the only evidence I could find that this wasn't a brand new item.

Part Five - First try

So time to give this a try, I rinsed out the tank and added fresh water. The instructions do say cold but I added warm tap water and the machine hit pressure within about 5 minutes. Book time states approximately 8 minutes from cold to reach pressure.

Usage is very simple, fill up with a litre of water, secure the tank cap and plug in.
The power light and orange heating light will come on, once ready to use the orange light goes out.
I did find that a fair amount of water blows out of the nozzle before it starts to release steam, this may be condensed steam from the cold hose but it quickly clears.

On full power, there are two settings on the trigger, the machine emits a very powerful blast of steam. I ran it along the cooker where a very annoying crevice runs the full width of the unit and the muck was literally blown out the end. First lesson learnt, watch where the fallout will go, as I had to wipe water and grease off the neighbouring washing machine.

Next up I attached the extensions and floor brush and steamed an area of carpet that didn't smell too good. The carpet had been thoroughly Vaxed the day before but contributions from an elderly dog had caused some stink to take up residence in a small area. Not to panic the germophobes out there but it was probably some sort of bacteria.

A couple of minutes running the steamer over the affected area and all smells are now gone. I found this interesting as the carpet had been cleaned with carpet detergent mixed with disinfectant until the water running up the Vax nozzle was clear. The carpet certainly looks rejuvenated by the steam, the pile seems to be refreshed and it looks like new. 

Part Six - Conclusion 

Although I am yet to turn this lose on the car, I am confident that it will be very useful. Certainly based on my experience thus far I would consider another refurbished product from Karcher, and for the money I feel comfortable in recommending this steamer. At around half retail price it is a bargain. 

Friday 14 June 2013

MK6 Fiesta on Bentley Rims!

Spotted this cheeky Fezzy on Detailing World in a showcase by Deep Shine Detail.

Apparently its a 1.4 at present but that's going to change. Link to full article HERE


A very different take on a Fiesta with those wheels and it has a marble effect roof too! Check out the full detail write up for more pictures and to see how the pro's clean a car.


Wednesday 12 June 2013

Angelwax QED review

I've been using this product for a few months now, its the first what you might call "Serious" quick detailing product that I have used across several cars.

 Its a spray wax type product, one up from the Demon Shine / Carplan type spray on shine and drying aids.

Application

I apply to a car after rinsing and with the bulk of the water removed but certainly not dry. Spray on and polish in with a microfibre.

Its a very simple to use product, the cloth glides very smoothly over the paintwork while working it in. There doesn't seem to be any magic amount of spray to apply or how wet the panel should be. Over application just results in a little more buffing and it taking slightly longer to evaporate.

I did experience on a slightly overly wet car that a slight haze, more akin to a full wax appeared but this just buffed away very easily.

Uses

Apart from adding some quick gloss to your paint work, this also acts as a very effective drying aid.
A quick wipe over with a microfibre and then applying QED just makes water disappear from panels, its quite remarkable.

Other quick detailers I have used are awful if applied to a wet panel, and take a long time and excess buffing to remove.

This product would be very useful for a post wax or polish wipe down, to remove any residue or dust.
Its highly lubricating and doesn't give any hint that the paint is suffering any abrasion.
Results

For this article I applied to our 2010  Skoda Roomster, which due to personal issues has not had the attention it deserves. There was no wax on the paint other than the contribution from a wash & wax shampoo.

The images below show it beading nicely and a nice amount of reflective glossiness even though it is a dull day and raining slightly while the photos were being taken. Application had been on Sunday evening, photographs taken the Tuesday evening after.

Pictures


Conclusion

I am very pleased with Angelwax QED, and will use it as part of my regular wash process across all our cars.

Whether you are a keen detailer looking for your next QD, or just someone who wants to quickly add a little more shine after a wash this is a product well worth considering. At £5.99 for a 500ml bottle it is good value and cheaper than various supermarket alternatives.

Roughly I think this bottle will give enough QED to do 10 or 15 applications, car size and paint condition dependant. If you car has lots of protection already then you should need very little, the Skoda having been somewhat neglected required a few more pumps per panel.

I will post follow up articles on Angelwax QED as I use it for different purposes and to provide some feedback on how well it lasts, does it build up with regular use etc.

Links

Angelwax QED @ Angelwax site

Price £5.99 per 500ml pump sprayer

Tuesday 11 June 2013

Convert 22mm outlet pressure washer to Karcher Quick Connect

Having a few pressure washers, and a surplus to requirements Karcher extension hose, I thought I would do a quick guide on converting a non Karcher washer to use Karcher hoses and lances via the newer Quick Connect system.

Here's our starting point:

One old (Very old!) Challenge Pressure Washer:


Thse are the connectors on the Karcher extension hose we will be recycling for this project:


The important part for any conversion is the quick release collar at the top of the frame, that can be unscrewed from the adaptor to reveal a M22 female thread that will screw directly to most domestic pressure washers, Karcher or other wise.


Here is the quick release collar, from the now dismantled hose. These can be purchased on there own as you see here, or as part of a Karcher kit that includes a 7.5m hose and a Karcher gun.

As mine was being reclaimed, and as you can see has some battle scars I changed out the 10mm o-ring shown in the picture.

Now we need to find a home for this on our washer, here is our trusty challenge once more:

Unscrew the existing hose from the washer to be left with a nice M22 threaded outlet:


The next stage is to clean up the treads on the outlet and screw the Karcher quick connect on: 


Job done, one Challenge washer converted to use a Karcher quick connect hose and gun.

This should work with most pressure washers with a 22mm Male outlet including:

-Challenge
-Dirt Devil
-RAC
-Bosch Aquatec
-Silverline
-Older Karchers with a 22mm outlet

For Nilfisk washers you would need to add in a 1/2 inch Female to 22mm male adaptor between the washer and the Karcher adaptor above.

Painting rear Drums - Pocket Money Project

So this is really more detailing than modding, drums are not sexy but on a small front wheel drive car they are more than adequate for rear end stopping power.

However over time they do go rusty and become horrific looking, detracting from the car and your shiny wheels. Rusty drums are beyond not sexy, they are rotating brown blobs of horrendous metal that must be rectified!

Any vehicle with drums that are unpainted will benefit from a quick clean up. Its very in-expensive, requires little work and makes quite a dramatic difference to how the rear wheels look. If nothing else it will stop rusty run off, dust and metal fall out from covering the rear wheels, saving cleaning work and potentially wheel refurb in the long run.

The following covers preparing and painting the fiestas rear drums, all paint, cleaners, brushes etc were sourced from Poundland and the 99p store!

Last of the big spenders me!

Items for the job:

Metal paint, dark grey hammered finish for that retro look   (Poundland straight to metal paint)
Degreaser                                                                          (Elbow grease 99p store)
Strong solvent                                                                    (Poundland nail varnish remover)
Wire brushes                                                                      (Poundland)
Cheap pack of paint brushes                                              (Poundland)


Starting point

So to begin with we do the obvious, crack the wheel nuts off, jack the car up and support it on axle stands.

Ensure the car is solidly supported before removing the wheels and storing out of the way. Tucked under the sills is a good place just in case something goes wrong with the stands.

DO NOT DROP A CAR ON YOURSELF & IF YOU DO; DO NOT BLAME ME!

Just thought I'd throw that out there, its frightening what some people regard as "Securely supported"

Before:

Here's a rusty drum, not very exciting as if you are reading this I'm sure you have two of your own.


Stage 1 - Removing loose rust and dirt:

So as everybody knows, painting is all about preparation. We can take a few liberties as we are working with fairly forgiving, direct to rust paint. However we want the finish to look good so we need to shift all the loose rust and crud first.

Break out the wire brush and go thoroughly round the drum and angled edge, do not do the wheel contact area as we cant see that part and the copper slip or other anti seize compound would be a nightmare to clean off.

This area should be mostly rust free as its protected by the wheel and copper slip or similar.


Ensure you brush off any part you intend to paint, try not to brush debris in between the drum lip and the hub. It probably wont cause any problems but may make nasty grinding noises for a while till it gets ground down.

Stage 2 - Degrease:

Take your preferred degreaser, not the solvent at this stage and spray on the areas you have brushed. Applying large amounts up close will help to blast any remaining loose contaminants off.

Leave to dwell on one drum while you work on the other and then return to the first. You may want to use one of your cheap paint brushes to work the degreaser into the drum to shift any stubborn dirt. Then spray on more solution and allow to run off.


The picture above shows a nice puddle of degreaser forming on the drive after running off the drum. Remember to rotate the drum while working to ensure you don't miss spots.

Don't allow the degreaser to dry out on the drum, we want to keep any unwanted grease or particulates in solution so they will wash off.

Stage 3 - Wash down:

So with most of the nasties removed from the drums, we need to clean away the degreaser as paint does not react well to most liquids, especially degreasers. We also want to wash away any other stubborn contaminants, which is where the solvent comes in.

You could use various chemicals for this stage such as Isopropyl Alcohol (IPA), brake cleaner, acetone, xylene, body shop pre paint cleaners. Basically it has to be a strong solvent that will evaporate without leaving any residue that could prevent a good paint finish.  

PLEASE USE SOLVENTS SAFELY - AVOID NAKED FLAMES, SMOKING, CONFINED SPACES, LACK OF VENTILATION  EXCESS INHALATION, SMALL CHILDREN, WILDLIFE, POND LIFE... blah blah blah you get the message I hope :).

 Take your solvent, ideally in some sort of trigger spray, and use to wash down the drums. We want to remove all the degreaser and other dirt. Rotate and keep spraying until it runs off as before, do the other side then return and repeat until you are happy the drums are clean.


Above you can see the washed down drum, with a brownish puddle underneath where the solvent has removed rust particles etc.

Allow the solvent to dry out completely before proceeding any further, on a warm day the solvent will evaporate faster, the puddle underneath will give an indication of how things are progressing.


Here we can see the solvent mostly dry, the drum has less sheen and there is less contrast between the different areas of the drum where they have corroded at different rates. Also the puddle beneath the drum is visibly drying out.

Do not rush this stage, paint likes solvents even less than it likes de-greaser. While its drying go have a coffee, a snack, take a nap or do something else to pass the time.

Stage 4 - Painting:

Finally we are at the main event, having done the preparation properly the painting should be quick and easy.

I went with two coats, the paint I used said about an hour between coats, but as it was one of the few warm days we have had this year I think it was closer to 30 minutes, if that.

Take care not to splash the stuff on yourself or the car, usual paint rules apply. Don't overload the brush, watch out for runs and as its a metal paint don't over brush areas that have started to cure.


There's the first coat on, looking better aleady. Don't forget to do the edge of the drum and the lip of the hub.


Second coat on and starting to dry nicely. I would recommend leaving as long as possible before refitting wheels just in case. The most likely issue with putting the rims on too quickly is dirt or dust coming off the wheel and settling into the wet paint which would look nasty.

Stage 5 - Refitting Wheels

Having allowed time for the paint to dry, add anti-sieze to the contact face of the wheel hub. Its important to cover anywhere that touches the drum as the copper slip will help prevent any stray spots of paint on the drum sticking to the wheel hub.

Once the wheels are back, lower down, torque up the nuts and admire your work.


Ensure you leave the recommended full drying time before you drive the vehicle so paint doesn't come flying off all over the place.

Results:

I was very pleased with the looks afterwards, a massive improvement over the rust that was there before.

As my drums have been on for around 60,000 miles, and I like the look, for me a hammered finish was the way to go. On newer drums or with more preparation work there's no reason not to use a smooth finish paint.

Cost wise it can be done for very little as this has shown, its a very quick job and will help to keep the wheels cleaner.

Monday 3 June 2013

Cars in the yard (Part 1) Fiesta MK4 LX

 So its not quite as impressive as a Need for Speed garage but here is the first quick run down of the cars I've got / am lumbered with looking after.

Fiesta MK4 1.25 LX - Nouveau Red

My second car, bought brand shiny new in 1998 when I was 18, now with 155K on the clock and still going strong. Touch wood its been very trouble free motoring, I lost a couple of exhaust valves on the M25 in 2010 resulting in the head going away for some tlc and coming back all cleaned up, new valves, shims and a nice skim that resulted in a lovely increase in torque. Finally had its first replacement clutch around 145k

Currently running as follows:

Engine:

Standard bar head work mentioned above.

Exterior:

LED side and number plate lights

H7R HID conversion ( "R" is the important part, designed for reflector lenses so no nasty glare)

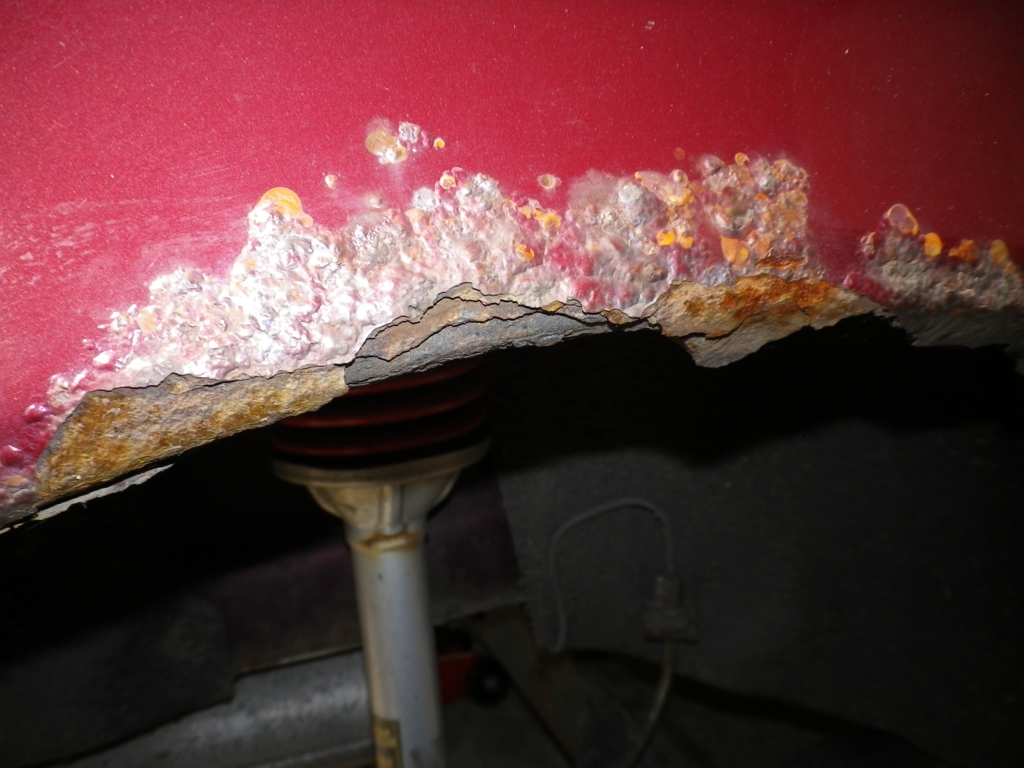
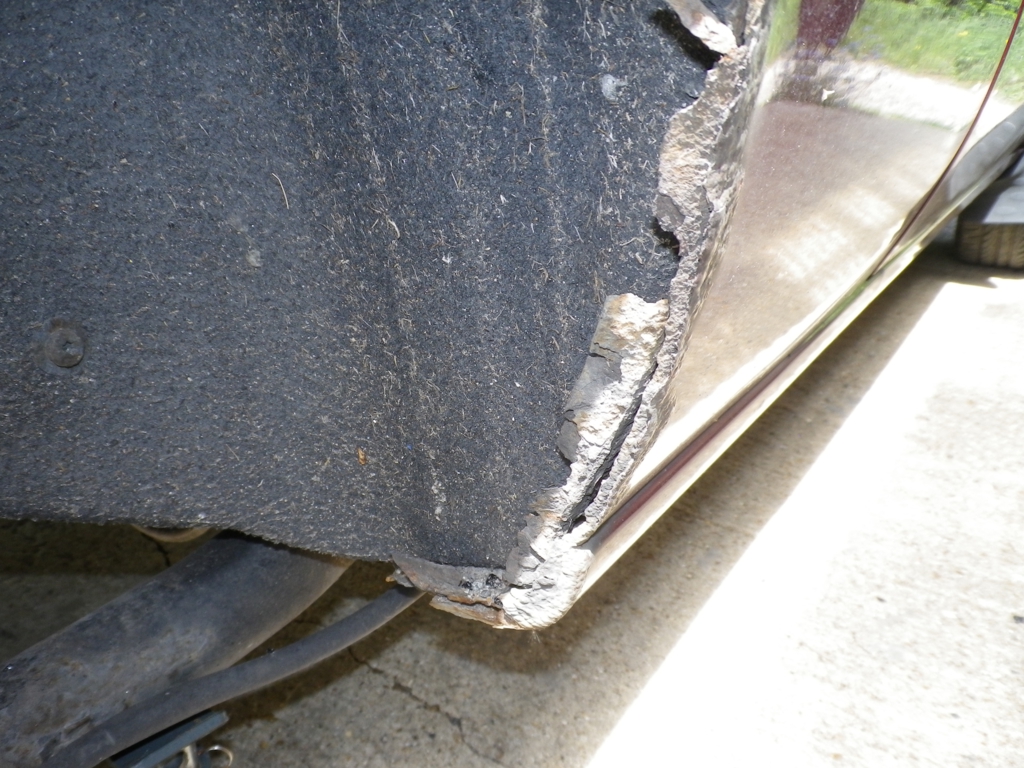
Paintwork still mostly good as I've looked after her, however rust badly eating the drivers side arch after being rubbed some years back. Other arch starting to rot, drivers side sill over the winter has gone from some bubbles to just plain nasty. Many car park scars, scratches etc.

Heres some pictures of the damage, those of a sensitive disposition should look away!

Worst part first, OS rear arch, rubbed in work car park circa 2004 and I failed to keep the wet out:


Next up a nasty scratch that runs front to back on the near side:


Bumper corners next, damage courtesy of considerate neighbours:


Now for the bonnet, classic lacquer peel from stone chips gone bad. A hazard of "Enthusiastic" B road driving for 15 years and 160,000 miles.


And finally a shot of the paint, apart from the odd swirly and the above little issues she was holding together quite well


Suspension:

Supersport uprated dampers all round, 40 mm drop at the front / 20 mm at the rear.
Was 40 mm  all round but far too bumpy on our crappy roads so swapper rear springs for Gmax 20mm drops.

Some pics of how the wheels sit:


OMP Front Lower Struct Brace

Rear 12.5mm Axle spacers, Ford item from a street Ka I think.

Zetec S Phase 2 14 Spoke alloys with 195/50/15 Avon ZV3 tyres
(Was steels / Then Momo arrows (Still awaiting refurb) / then Momo Racers now utterly wrecked.)

Competition extended wheel studs +10 mm length over standard.

Heavy duty rear beam bushes

Brakes:

Braided hoses

Interior:

Zetec S Charcoal and Blue seats

Momo gear knob and handbrake handle

Steering wheel cover (A bit Gandad I know but I have big paws and it makes the wheel a touch bigger)

ICE:

Pioneer Single DIN CD / SD / USB head unit

Vibe 4 Channel Class D amp

Alpine Class D Sub amp

Fusion Components in front doors | Infinity reference 6x9 in rear shelf | Vibe Exact 8 Sub

Ixos Gamma Geometry Speaker Cable | Auto leads and Shark power cables and fittings

Stinger 1 Farad power cap

What's next:

Tin worm to be sorted out properly, rust to be cut out with new panels welded in for both sills and both rear arches.

Paint repairs all round. Underside and inner arches all to be rust proofed and painted

[As of  Wednesday 29th May 2013 she is in the care of Steve the restorer. Nice pictures of a mint fezzy in approximately 3 weeks!]

Over Fenders

Brake upgrade from the standards to 260mm from a MK6.5. Paint to callipers and rear drums before fitting. Will do calliper painting post when I finally get time to refurb them.

Oil catch can

Rear upper strut brace

Longer Term - Engine swap to Puma 1.7 or  possibly a rebuild with 1400 bottom end and current head for a high compression engine.